Nick Bicanic is Founder & CEO of RVLVR Labs. Original content found here.
Just in case anyone is interested— here’s the current setup I like to shoot with.
There are three distinct pieces to the setup — but every single one is wireless and independent.
CAMERA SYSTEM
Ok well we know this one already from previous photosets — it’s a Z-cam S1 PRO on a Nodal Ninja travel pole with Freedom 360 legs/base.
The optical path is HDMI out to Teradek Sphere to WiFi router.

S1 Pro wireless configuration
STITCHING/MONITORING SYSTEM
This is a little bit new. For those who know the Sphere you know that an iPad Pro is required to stitch the material on-the-fly.
But — if anyone has tried to carry around an iPad on set — you’ll know that it’s kind of a pain. How do you hold it — where do you put it etc.?
And more importantly — how does anyone else monitor the shoot if the director is holding the iPad.
So after seeing a bunch of different systems with cables and converters enter the RVLVR rig (pronounced ReVoLVeR) for wireless on-set monitoring and quick-stitching.
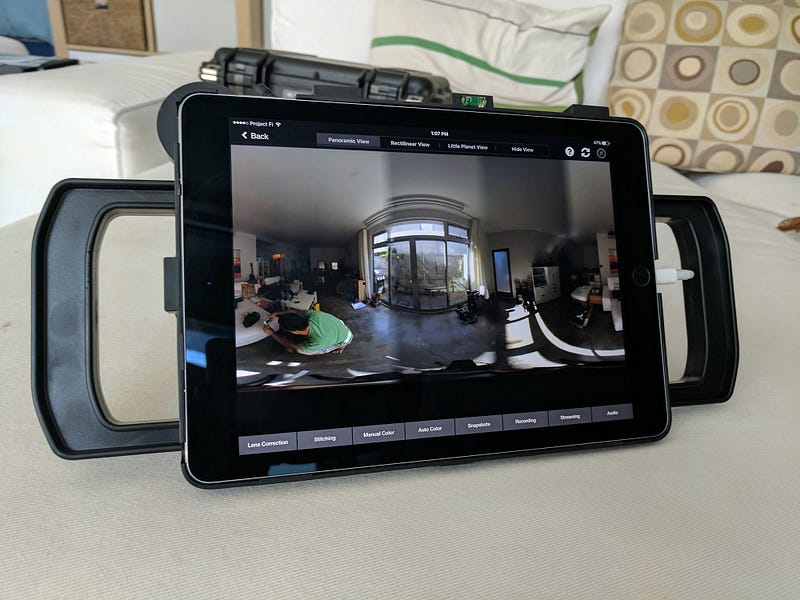
iPad PRO 9.6 inside RVLVR rig
The front seems innocent enough — it’s just an iPad PRO 9.6 with side handles and a lightning cable sticking out. But let’s look at the back:
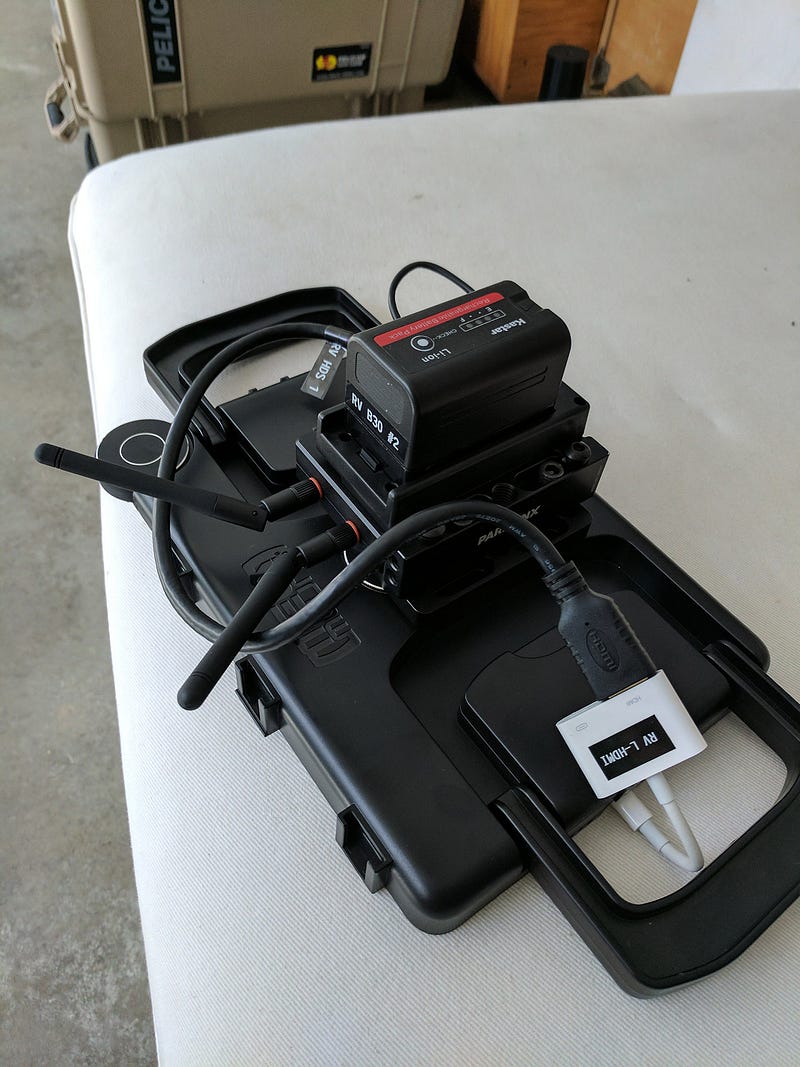
Back of RVLVR iPad PRO rig
So let’s follow the signal — it’s lightning into HDMI output into Paralinx Arrow-X. (powered by same Sony B battery I use for camera and sphere) All mounted on a SmallRig cheeseplate I bolted to the back of a Melamount iPad Pro case.
The Arrow-X is a phenomenal piece of equipment (somewhat similar to the Bolt family from Teradek) . It’s basically a zero-delay HDMI transmission device (that takes the place of a hardline cable).
This setup allows whoever is in charge of the iPad (DIT, VR DP, etc.) to monitor the take while cameras are rolling, simultaneously record a quickstitch , and move around to maintain maximum quality of signal from the camera — without worrying about compromising the signal in the Video Village. Which brings us to the third and final section:
VIDEO VILLAGE/CLIENT MONITORING
How are clients/agency people going to munch on craft services and check their Facebook while monitoring the shoot in peace?
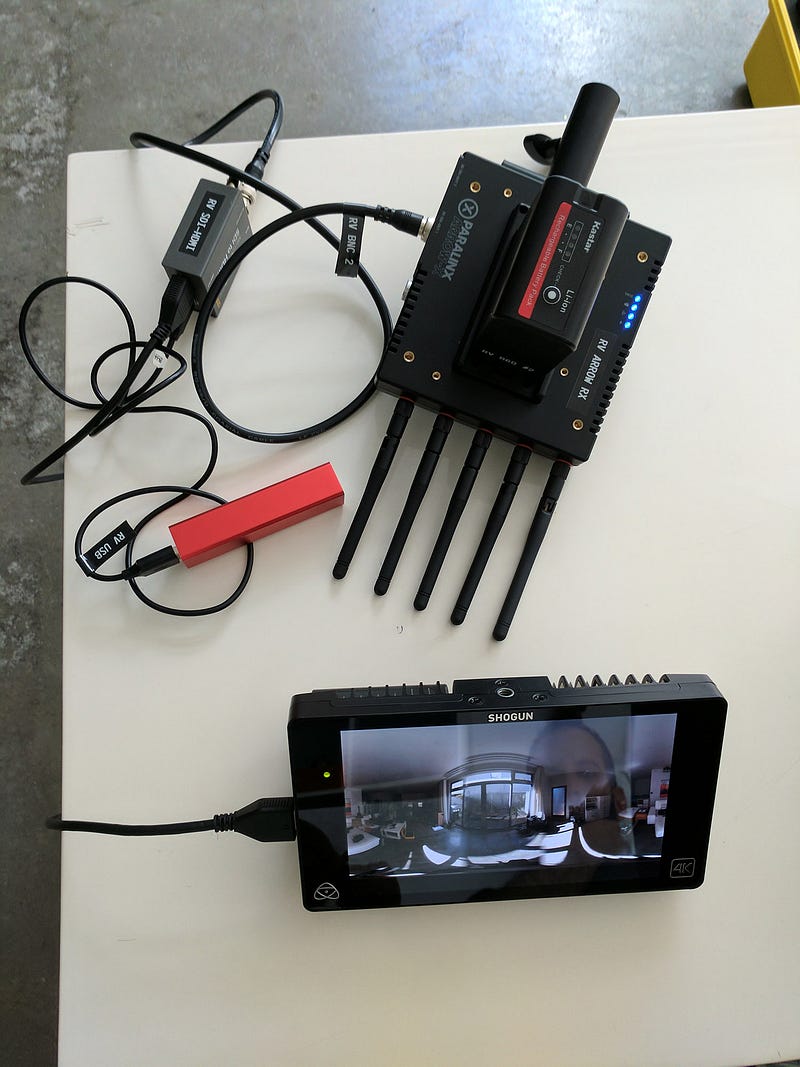
Video village wireless setup
The answer is the second half of the Paralinx Arrow-X system. The receiver pictured above with 5 antennas (also powered by Sony B battery) spits out SDI traditionally — but you should always have a converter handy just in case there are only HDMI monitors on set. In this case, my Atomos Shogun is pretending to be a giant on-set monitor — and it’s taking a signal from a Blackmagic SDI to HDMI converter. (The converter is powered from the tiny USB brick). You could of course run the whole thing from various other batteries or AC power.
That’s it — I find it’s a super flexible system. Bits and pieces can be replaced. For example , you might not need Video Village at all if you’re on a small indie set. And you can use different wireless HDMI transmitters.
Approximate total cost of this setup is $16,500 (including camera, sphere etc .— only thing I didn’t include was the monitor).
Keep up with Nick's seriously awesome workflows on his blog.